Imagine having the power to not only recognize your returning site visitors but to understand their behavior. Fingerprint Identification handles recognizing your return visitors. This allows you to keep accounts secure, protect transactions, and spot fraud, all while delivering a seamless experience for legitimate users.
But recognizing users is just scratching the surface. Fingerprint Smart Signals take things to the next level by giving you useful insights, like whether a visitor has tampered with their browser, is hiding behind a VPN, or is a bot in disguise. With these extra insights, you can stay two steps ahead of fraud.
Now, the real question is: With over 20 Smart Signals, which signals should you start with to make the most impact? The way you incorporate these insights can make all the difference. In the rest of this post, I'll break down our most popular signals, show you how to make them work for you, and help you get the most value out of what Smart Signals have to offer.
Key Smart Signals for fraud prevention
Fingerprint has over 20 Smart Signals for browsers and mobile devices. Each signal provides data in a JSON object related to an identification event. Below, I've highlighted five of the top signals that our customers find most effective for keeping fraud in check. But this list is just a starting point — you can dig into the full lineup of available Smart Signals in our documentation. Let's dive into our top five most commonly used Smart Signals.
Bot detection
The Bot Detection Smart Signal identifies automated activities on your website, making sure it’s humans doing the clicking and not bots. Catching bot activity helps you fend off credential stuffing, automated account creation, content scraping, spam submissions, and other bot-driven attacks. Once bots are detected, you can take steps to block malicious requests, ensuring your platform remains secure from automated threats.
{
  "bot": {
    "result": "bad",
    "type": "headless"
  },
  "url": "https://example.com/",
  "ip": "193.165.141.254",
  "time": "2024-11-12T09:29:59.588Z",
  "userAgent": "Headless",
  "requestId": "1712914199539.K1EXmu"
}
The Bot Detection bot.result field tells you what you’re dealing with. notDetected means no bots were detected. good points to a known web crawler or search engine bot, which may or may not need blocking, depending on the activity. bad means you’ve got a bot up to no good that should be blocked or flagged for further scrutiny. You’ll also see additional information about the bot such as the IP address and user agent detected.
VPN detection
While Virtual Private Networks (VPNs) have legitimate use cases, fraudsters love them, too. They use them to hide their location or switch up their IP address, allowing them to easily evade location or IP-based security checks.
On its own, VPN usage might be harmless, but depending on the use case or if paired with other high-risk signals, it is also a valuable data point for assessing potential fraud. Once detected, you can prevent location-based fraud, such as bypassing geographic restrictions or regional pricing policies.
{
  "result": true,
  "confidence": "high",
  "originTimezone": "Europe/Prague",
  "originCountry": "unknown" // Not yet supported for browsers
  "methods": {
    "timezoneMismatch": true,
    "publicVPN": true,
    "auxiliaryMobile": false, // Irrelevant for browsers, mobile SDKs only
    "osMismatch": true
  }
}
To put the VPN Detection Smart Signal to work, use the result field as a quick flag for spotting VPN usage. The confidence level gives the likelihood that the VPN detection is accurate. This allows you to decide whether to block the action or just add a bit of friction. You can also use the timezoneMismatch, publicVPN, auxiliaryMobile, and osMismatch fields to get more granular insights.
The timezoneMismatch field detects discrepancies between the user's system timezone and their IP-based geolocation. The publicVPN field flags whether the user's IP matches known public VPN providers. The osMismatch field identifies inconsistencies between the reported operating system and the network signature. The auxiliaryMobile signal is only populated when our native iOS or Android SDKs are used.
IP geolocation
IP geolocation pinpoints the physical geographic location of a user's originating IP address. Fingerprint uses several mechanisms to detect the IP address of the original client, allowing for the correct determination of a visitor's location even when anonymizing tools are used.
Knowing the physical location of an IP address can help detect fraud by identifying risky regions known for high levels of fraudulent activity or by enforcing regional regulations and compliance requirements. When combined with other signals, IP Geolocation provides a more complete picture of potential risks, adding an extra layer of scrutiny for potentially fraudulent activities.
{
  "v4": {
    ...
  },
  "v6": {
    "address": "::ffff:5e8e:ef7c",
    "geolocation": {
      "accuracyRadius": 20,
      "latitude": 50.05,
      "longitude": 14.4,
      "postalCode": "150 00",
      "timezone": "Europe/Prague",
      "city": {
        "name": "Prague"
      },
      "country": {
        "code": "CZ",
        "name": "Czechia"
      },
      "continent": {
        "code": "EU",
        "name": "Europe"
      },
      "subdivisions": [
        {
          "isoCode": "10",
          "name": "Prague"
        }
      ]
    },
    "asn": {
      "asn": "7922",
      "name": "COMCAST-7922",
      "network": "::ffff:5e8e:ef7c/110"
    },
    "datacenter": {
      "result": true,
      "name": "DediPath"
    }
  }
}
To leverage the IP Geolocation Smart Signal, use the geolocation object to obtain an estimated physical location of the client. The geolocation object gives you attributes like accuracyRadius (the radius in km around the estimated location), along with details like city, country, continent, and timezone for a full rundown on where they’re likely located.
Additionally, you can use the asn and datacenter fields to group ranges of IP addresses belonging to the same owner, which can help in applying protection rules against entire blocks of IPs. These fields can also let you know if a visitor is connecting through an intermediate server rather than directly through an ISP, which may warrant further inspection.
Browser tampering
The Browser Tamper Detection Smart Signal catches modifications in the browser environment, such as changes to user-agent strings or suspicious alterations to browser settings. Fraudsters often use simple techniques like User Agent spoofing or altering browser outputs to try and fool less sophisticated fingerprinting algorithms and slip past security measures.
While Fingerprint's visitor ID remains stable in such cases, tampering detection helps identify these suspicious behaviors. By detecting tampering, you can flag risky sessions and take preventive actions, such as requiring additional authentication or denying access to sensitive areas.
{
  "result": true,
  "anomalyScore": 0.97, // close to 1 = high level of confidence
  "antiDetectBrowser": false
}
This signal returns a boolean result and a 0 to 1 anomalyScore. The anomalyScore field indicates how unusual the browser signature is. Values close to 1 represent highly anomalous browsers, and anything above 0.5 flips the result value to true and should be considered a red flag. Additionally, the antiDetectBrowser property lets you know if an anti-detect browser, such as Incogniton, has been detected. This detection will also flip the result value to true even if the anomalyScore is 0.
Velocity signals
The Velocity Signals Smart Signal keeps an eye on the total count of key data points over different time frames. By counting the number of data points such as unique IP addresses, linked IDs, visitor IDs, and countries associated with each other, this signal can sniff out patterns indicating potential threats or anomalies.
Legitimate users typically exhibit consistent behavior, such as one country for one visitor ID, whereas higher cardinality of this data can indicate malicious intent. For example, a high number of IP addresses associated with the same visitor in a short period may indicate attempts to circumvent detection. Similarly, detecting a flurry of different visitor IDs associated with a single account (noted via the linkedID custom field) in quick succession could signal account sharing. By monitoring these metrics at multiple intervals, businesses can reduce the risk of fraud by detecting suspicious behaviors.
// Example is showing only one of the velocity signals
{
  "distinctIp": {
    "intervals": {
      "5m": 1,
      "1h": 1,
      "24h": 5
    }
  }
}
The data provided by Velocity Signals is aggregated over 5-minute, 1-hour, and 24-hour intervals to detect abnormal activity. Each data point includes counts for these intervals, labeled as 5m, 1h, and 24h. Counts of distinct data points are provided per visitor ID, linked ID, and IP address. The total sum of events per IP address and visitor ID is also included. For visitors with exceptionally high activity, surpassing 20,000 counts within 24 hours, we will exclude 24-hour aggregations for unique IP addresses, countries, and linked IDs.
Finding your top Smart Signals
While the Smart Signals mentioned above pack a punch, what signals suspicion and fraud in your specific environment may vary. Some signals may be stronger indicators than others based on the makeup of the visitors to your site or mobile app. For example, some of our customers use the list of installed fonts to spot visitors from high-risk countries that use specific characters in their languages. Turns out, this little detail is surprisingly good at sniffing out fraudsters in their environment.
To find your top Smart Signals for identifying risk, you can start by adding the Fingerprint JavaScript agent to your sensitive pages to collect data. As you gather Smart Signal data, it’s important to link these events to known suspicious or fraudulent activity.
There are a few ways you can go about it: You can use the Fingerprint Server API to grab Smart Signals from your backend and save them in your database, along with the triggering activity’s outcome. Another option is to set up Fingerprint to send Smart Signals for each identification event via a webhook to your API, so you can update the event data asynchronously when you spot any suspicious behavior.
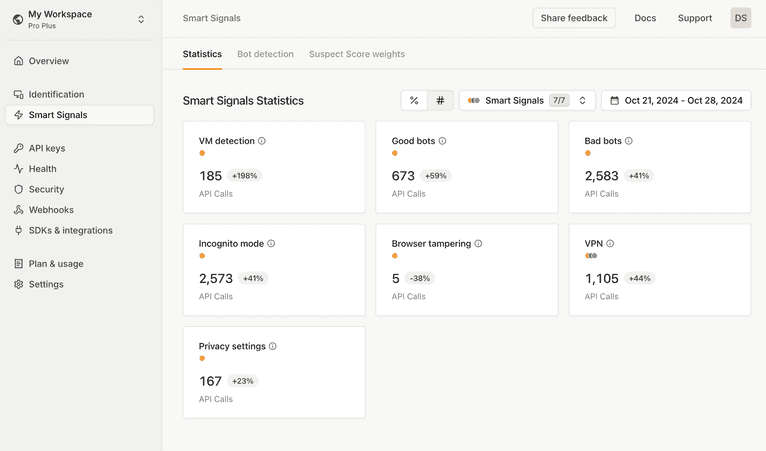
You can also use the PUT /events endpoint in the Fingerprint Server API to flag events as suspect after the fact when you detect something shady. Additionally, you can find summaries of your Smart Signal data in the dashboard:

Then, analyze the correlations between the data received from Smart Signals and confirmed cases of fraud to identify which signals are the strongest indicators of risk for your use case. This kind of assessment helps you fine-tune your fraud detection, focusing on the signals that actually make a difference in spotting and stopping fraud in your environment.
You can even tailor the use of different signals for specific pages or actions. Plus, Smart Signals can be included as features in your fraud prevention machine learning models, providing valuable data to train on and improve your detection accuracy.
Suspect Score
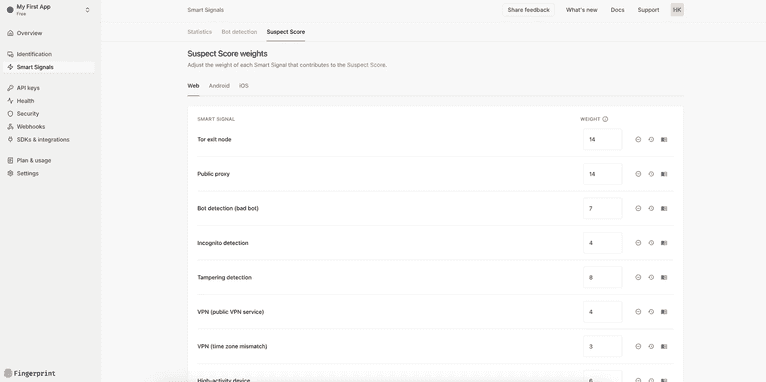
If you’re not sure where to start or are still analyzing your own Smart Signal data, the Suspect Score is like a cheat code for spotting shady behavior. It’s a single number that indicates how many Smart Signals suggest potentially suspicious or fraudulent activity for a given identification request. Each activated Smart Signal contributes a positive integer, known as a weight. The more Smart Signals that show up, the higher the score climbs, signaling a higher likelihood of suspicious behavior.
The default weights are set based on how likely each Smart Signal is to be triggered on a global scale. Smart Signals that are less likely to be triggered have stronger weights, and vice versa. As you gather more data on which signals provide the best indications of fraud in your own environment, you can adjust the weight of each Smart Signal that contributes to the Suspect Score and make it work even better for you.

How to implement Smart Signals
In this section, we’ll quickly walk through how to integrate Fingerprint Smart Signals into a login flow using the Server API. The steps include adding the Fingerprint JavaScript agent to your front end, making an identification request, sending the received requestId to your backend, retrieving full details and Smart Signals via the Fingerprint Server API, and using that data to act on suspicious behavior.
Step 1: Load the Fingerprint JavaScript agent
Start by including the client agent on your login page. The agent should be loaded as soon as possible, such as on page load. You can add it using a script tag or by importing it into your project using one of our SDKs.
const fpPromise = import('https://fpjscdn.net/v3/PUBLIC_API_KEY')
  .then(FingerprintJS => FingerprintJS.load());
Step 2: Make the identification request
After the agent has loaded, use it to identify the visitor. Generally, identification requests should be made when the identification is needed, so in this example, trigger the request when the login form is submitted.
// Request visitor identification
const fp = await fpPromise;
const result = await fp.get();
const requestId = result.requestId;

// Send the requestId to your backend for further processing
fetch('/api/login', {
  method: 'POST',
  headers: {
    'Content-Type': 'application/json'
  },
  body: JSON.stringify({ requestId, username, password })
});
Note that without the proper steps, ad blockers can block your identification requests. Read our documentation to learn how to protect your implementation.
Step 3: Retrieve Smart Signals on the backend
In your backend, use the requestId to fetch full event details and Smart Signals from the Fingerprint Server API. Here’s an example using Node.js SDK.
import {
  FingerprintJsServerApiClient,
  Region,
} from '@fingerprintjs/fingerprintjs-pro-server-api'

const client = new FingerprintJsServerApiClient({
  apiKey: '<SECRET_API_KEY>',
  region: Region.Global,
})

const identificationEvent = await client.getEvent(requestId);
Step 4: Handle suspicious behavior
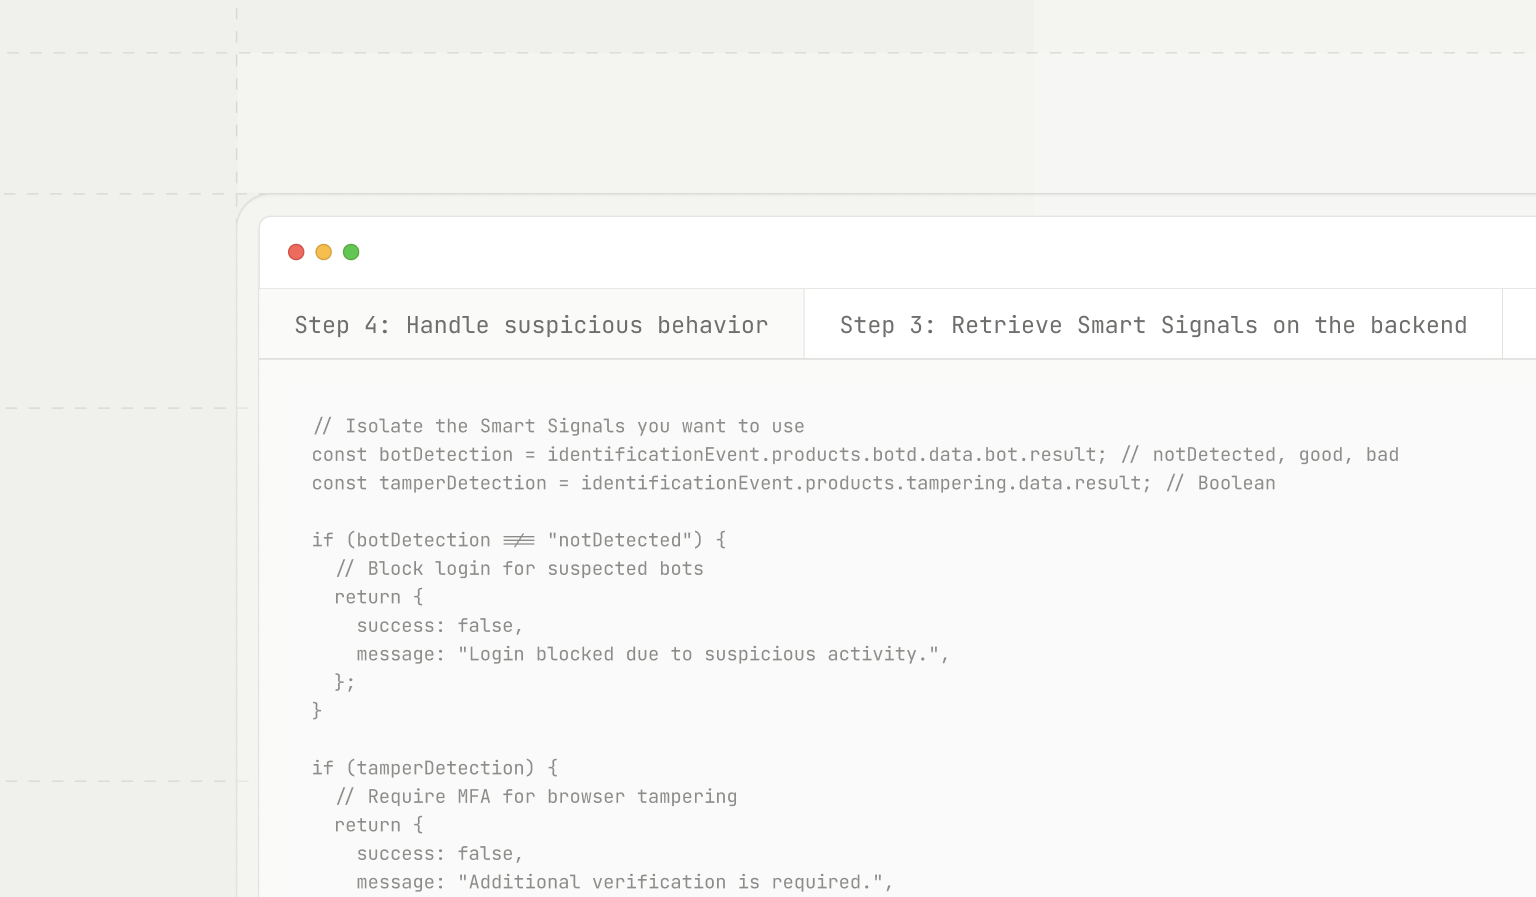
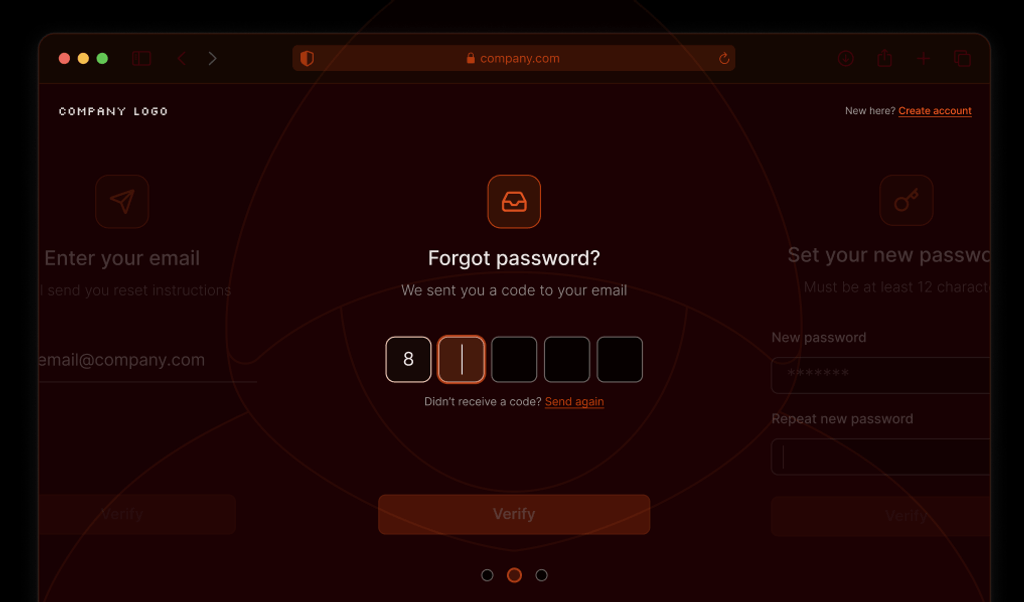
Use the Smart Signals data to take action based on what is detected. For example, if bot activity is suspected, you might block the login attempt. If browser tampering is detected, you could prompt the user to complete an additional form of multi-factor authentication (MFA).
// Isolate the Smart Signals you want to use
const botDetection = identificationEvent.products.botd.data.bot.result; // notDetected, good, bad
const tamperDetection = identificationEvent.products.tampering.data.result; // Boolean

if (botDetection !== "notDetected") {
  // Block login for suspected bots
  return {
    success: false,
    message: "Login blocked due to suspicious activity.",
  };
}

if (tamperDetection) {
  // Require MFA for browser tampering
  return {
    success: false,
    message: "Additional verification is required.",
    action: "sendOTP",
  };
}

// Proceed with normal login flow
// Perform user authentication with username and password
return authenticateUser(username, password);
This approach allows you to dynamically adapt your login flow and enhance security based on the specific suspicious behavior detected for each visitor.
Put Fingerprint Smart Signals into action for stronger fraud prevention
Using Fingerprint Smart Signals is an important step toward staying ahead of fraud, allowing you to detect suspicious behavior and tackle threats before they escalate. Integrate these signals into your site or mobile app, and you’ve just added a new layer of security to keep both your users and your business safe from fraud.
Remember, no two environments are exactly alike. While some Smart Signals may be universally strong indicators, the ones that flag fraud most effectively in your environment might be a whole different story. Take the time to experiment, fine-tune your strategies, and adjust based on your own data to get the best results.
Want to learn more about beefing up your site’s security with powerful device intelligence? Contact our team or start a free trial to start digging into your own visitor traffic and Smart Signals data today!


